Some people asked me for showing Picasa albums in a page of Blogspot, and in my latest template that made for customer, he requested the same. So in this post, I will show you the way to embed Picasa Gallery in Blogger by using Jquery Picasa Gallery. This plugin is writen by Alan Hamlett at http://ahamlett.com .

1,Go to this website: http://ahamlett.com/jQuery-Picasa-Gallery/ Download the zip or tar file. Then extract them. You will see files :
jquery.picasagallery.css
jquery.picasagallery.js
and a document name Fancy box.
2,If you have a private hosting, you can host files above in your own host.
3, If you do no own a hosting ,you can embed scripts and css into template file by using tips in this post : Unlimited hosting for blogger
4, Open template file, then add lines as bellow :
If you have no hosting and follow step3, you can skip this step.
5, Save template file and upload to your host.
6, Go to Blogger Dashboard -> Create a pages . You can name it whatever you want . In my case, I choose "photo gallery"
7, In editor window , choose HTML mode ,then add the code bellow into content :
That's all. Hope this tip helpful to you.

Demo
1,Go to this website: http://ahamlett.com/jQuery-Picasa-Gallery/ Download the zip or tar file. Then extract them. You will see files :
jquery.picasagallery.css
jquery.picasagallery.js
and a document name Fancy box.
2,If you have a private hosting, you can host files above in your own host.
3, If you do no own a hosting ,you can embed scripts and css into template file by using tips in this post : Unlimited hosting for blogger
4, Open template file, then add lines as bellow :
<link href="your_host/jquery.fancybox.css" rel="stylesheet" type="text/css" media="screen" />Replace link in code above with url to files in your host.
<link href="your_host/jquery.picasagallery.css" rel="stylesheet" type="text/css" media="screen" />
<link href="your_host/jquery.fancybox-thumbs.css" rel="stylesheet" type="text/css" media="screen" />
<script src="https://ajax.googleapis.com/ajax/libs/jquery/1.7.1/jquery.min.js" type="text/javascript"></script>
<script src="your_host/jquery.fancybox.pack.js" type="text/javascript"></script>
<script src="your_host/jquery.fancybox-thumbs.js" type="text/javascript"></script>
<script src="your_host/jquery.picasagallery.js" type="text/javascript"></script>
If you have no hosting and follow step3, you can skip this step.
5, Save template file and upload to your host.
6, Go to Blogger Dashboard -> Create a pages . You can name it whatever you want . In my case, I choose "photo gallery"
7, In editor window , choose HTML mode ,then add the code bellow into content :
<script type="text/javascript">Replace alan.hamlett in code above with your Picasa username . Save page and back to your blog to see result. When you click on photo gallery page ,you will see all public albums in picasa will be shown , you can click on each album and view the image with effect from FancyBox.
$(document).ready(function() { $('.picasagallery').picasagallery({'username':'alan.hamlett'}); } );
</script>
That's all. Hope this tip helpful to you.

After a long time working and test, Download Page is now live in SimplexDesign blog. You can access through the link in top navigation bar or through this address :
http://templates.thesimplexdesign.com/
This page will keep you up to date to all changes made with SimplexDesign templates , all new templates or bug fixed. All files here automatically sync with files in my computer, and refresh every minute. So updating template is not a nightmare anymore.Another thing should be notice here : if you see only one files or more when visiting this page, maybe it's in updating time. Refreshing again and you will see them in full.
At this time, there are some templates uploaded to this Download page. It will take time for all Simplex templates because I have to test them all again.
For templates uploaded, I integrated all scripts into templates files, so you don't need to worry about finding hosting provider for script or website downs because of 110mb.com.
In the future, I will make two editions for each templates . One comes with all script and image files so you can host yourself , and one comes with all scripts integrated in template file. This was my idea before but it will take time to become reality.
That's all for this post. Hope new Download section will shorten our times when working.

In SimplexDesign blog, I always welcome bloggers who want to contribute content and giving value to readers . Guest blogger can place two links in the bio as an exchange to his contribution . When site grows , I receive more and more guest posting proposal everyday. But it doesn't mean all guest posts I received are good enough to publish. In this post, I will show you what need to do to make me publish your guest post :
1, Quality of content
It's the first thing that I concern when receive a guest post . As mentioned above, I only receive posts that give value to readers. It means readers must feel that they see something new after reading post. Content must be original and unique, and people can apply to their blog.Many guest blogger sent me posts so simple that we can find out in internet thousand posts with the same content just by a click. For example a post name 'SEO techniques' is about using H1 tag, title, meta tag ... Or another post name 'Social marketing technique' focus on how to register Twitter /Facebook and create a fanpage only.
Don't misunderstood my words, content in the posts above are not wrong, but I think none of you visit SimplexDesign for a thing like this.
2, Pay attention to the guest posting rules
In my blog ,there's a page name 'write for us' in the top navigation bar . This page show guest posting rules, niche topics, link, bio and email address that you can send post to. For saving times, please don't send me posts on other niches, for example: education, real estate ...They can be published in somewhere else, but not my blog.Take your time in reading guest posting rules, I think it will easier for you and me. As a blog owner, I feel ok with guest posting proposals that already know what niche topics to write. And I think other blog owners who accept guest posting are the same to me.
3, Take care of the biography
All I want for a good biography at the end of guest post is basic information on guest blogger, and links to his/her profile or website.Don't use this for advertisements, don't use this to write something that not about you. It will increase the opportunity your post appear in my blog.
4, Considering link building strategy before submitting guest post
I know many blogger who want to increase ranks, so he/she hire ghost blogger submit guest posts with back links to everywhere. But Google has changed their policy and some blogs got penalties from Google for their back links.Several days ago, I have to remove back links in a guest post as request of a webmaster. He hired link building service submit guest posts to many sites, even unrelated sites, afterthat, his website has been moved to Google sandbox.
Guest blogging bring benefit to both of guest bloggers and blog owner. I'm not an expert that know and write everything. So I need contribution from you all. Knowledge is for sharing.
If you follow all things above, I think your post will appear in my blog soon.
Have you ever ask for the value of your site ? How much is your site worth ? I found this infographic in Webstarts website that may helpful to you all . 
Via: WebStarts
Via: WebStarts

If you ask a handful of people what the purpose of a blog is, chances are you'll get a few different answers.
- For writers, a blog is a place to hone their skills and get their thoughts published easily and inexpensively.
- For readers, a blog is a place to read others' ideas, stay up-to-date on the latest news and trends or learn about a topic that interests them.
- For Internet marketing mavens, a blog is a means to boost a website or brand's SEO ranking.
1. Use photos in your posts.
It's no secret that a blog post comprised of both photos and words is a lot more enticing to readers than a blog post that appears to be a page of endless text. Use images to break up large chunks of text, add value to your post, illustrate your point and keep your blog visually appealing. Of course, the type of image you use matters. I'm a fan of stock photos, but not the cheesy ones (you know, models smiling right at the camera and holding some sort of inanimate object). Sure, it takes a little time to find good, quality stock photos, but it's well worth the effort. Also, don't shy away from using screen shots, graphs, charts and infographics in your blog posts as they make for a nice change of pace.2. Tell your story.
The best way to be seen as an expert in your industry is to establish yourself on all fronts of your brand's web presence, and this includes your blog. An easy way to do this is to tell your story — or your company's story. Feature details about your education, credentials, humble beginnings and professional growth. Another way to establish yourself as an expert is to show who's behind your blog. Put a face with a name by including a short bio section that features all of your blog's contributing writers. I know from experience that many surety bond companies do this. Although some readers will pass right over the "Meet Our Team" page, others will appreciate the behind-the-scenes information and will realize the value in what you have to say.3. Promote your blog via social media.
Today, engaging with your audience on a personal level is a large component of finding SEO success. An easy way to engage your readership is to incorporate social media on your blog. How? With social media buttons. Take a look at some of your favorite blogs. Chances are they'll have buttons for Twitter, Facebook and Google+ on each post. Some blogs even include buttons to email posts and share them on Digg, LinkedIn, Tumblr, WordPress, Pinterest and other social media platforms. Additionally, give readers a way to subscribe to your blog via email by providing an RSS feed or FeedBurner signup form on your homepage. Installing these features on your blog is easy and can be done with the insertion of simple code in your site's HTML. Altogether, putting social media links on your blog is a little-effort-high- result way for visitors to share your content.4. Focus on timely, relevant and accurate content.
Nothing will cause a visitor to leave your blog faster than seeing a post from several months or even years ago at the top of your blog feed. As Internet marketing professionals, we know that Google rewards timely, accurate and original content, and these values should be translated to how you manage your blog. To keep readers interested in what you have to say, get to know your audience and publish information that pertains to who they are and what they know. To keep them coming back for more, publish content on a regular basis. Daily is best, but every other day or twice a week is also effective. Posting fewer and further between will give readers the chance to forget who you are and why they visited your blog in the first place. We live in a day and age where Internet marketing is always evolving, and blogging is no exception. There are a million things you can try to draw readers to your blog and keep them there, but these four tips are a good starting point for those looking to improve their reputation in the Blogosphere.About Guest Blogger
Sara Aisenberg is an Internet content writer by trade and has experience writing about surety insurance, small business, Internet marketing, healthcare, travel and more. Sara strives to stay up-to-date on the latest SEO practices to help business professionals of all kinds make the most of their marketing efforts. Follow along with Sara on Twitter @SaraAisenberg.
1,If the host 110mb.com live again ,you can open template files ,search for what files hosting in 110mb.com ,download them and than upload to your host . After that ,replace links in template files .
2,If 110mb.com downs ,you can search for file in internet ,very simple ,for example :
Search for file :jquery.js , I open GOOGLE and type 'jquery.js' in search box and press Enter , jquery.com site which provide jquery.js is the first one in search result ^^
Now you got it .
Repeat for other files , I must say that all files I used in template are popular js script in internet and it's the line in search result . So don't need to worry I hide something or have special script that don't want you to know . So what to do when you have js file ? you can buy a host ,I recommend a host that support CDN for best quality and than host your files there . Don't upload your files to services such filefactory.com ,rapidshare.com ,mediafile.com ... because they are file sharing services ,and file hosted in these host can't use directly . If you don't have enough money for a host , you can see my post here for unlimit hosting for blogger

1, Go to Blogger Dashboard -> Template - >Edit HTML
2,Add this code before </head>
<link type="text/css" rel="stylesheet" href="http://static.graddit.com/css/graddit.css" />3, Go to Graddit.com . Choose a style that you want to apply . Click on Blogger link

4,Back to Blogger Dashboard ->Template ->Edit HTML
Find the code <data:post.body/>
And paste the code you copied in step 3 before <data:post.body/>
5,In case you want to make star rating for a specific post , in step 3 ,click on Generic link .
Copy the code in text box .Go to Blogger post editor window ,choose edit HTML mode and paste the code in post content .
That's all .Save template and you can check the result .
I made a demo for this star rating in this post . You can see it work before deciding install or not .
{[[' ']]}
']]}
']]}
Many people mail me ask me for solving error when installing new template . They installed template in their main blog and every error occured may affect to their site performance . So in this post , I would like to show you the way for testing new template with all data from your main blog ,but do not affect to main blog performance .
1, Create a new blog for testing
2, Export all data from your main blog :
Go to Blogger Dashboard of your main blog -> Settings -> Other > Export blog
This function will export all posts and comments in your blog to an xml file .
3, Import your data to new blog
Go to Blogger Dashboard of your test blog - > Setting -> Other -> Import blog
A new dialog will apear . Choose the data file (xml format) which you export before to import then wait for the whole process .
4, After that ,all data from your main blog has been imported to test blog . You can now test your blog with all post setting ,all widgets ,scripts ,and functions of your new template .
When you finish your editing , the test blog is reflection of your main blog after changing to new template . Now you can use the template in test blog to main blog . The cutover time from old to new template will be short and it doesn't affect to your main blog performance whenerver you make a change or test .
The most important thing is to back up and keep track in each steps . You must be very clear on what changes you made ,what script you added , so we can do draw back whenever error occured . It's very hard for you - the blog owner and ours - who are willing to help - in solving error if we don't know what you did .

Some of you asked me on how to make a floating share button which slide in left or right side of website . It's very simple and easy . In this post ,I will show you how to do this with addthis.com service.
1,Go to Addthis.com
2,Click on Get the code at the top navigation bar
3,In style section ,choose the style that I marked circle

4,Copy the code in the right

5,Go to Dashboard - > Template ->Edit HTML .
Paste the code at the end of template ,right before </body>
6,Save changes .
Now you can go back and check the result .

After reading some comments from you on Customize threaded comment system and check by myself ,there's an error when applying CSS in this post: the reply button and load more button are not work .
Now in this post ,I will show you how to customizing theaded comment system like Simplex Bigblue template .
New threaded comment system use more javascript than the old comment form . It's mean if we look into the template code ,we couldn't know what HTML tags will be used in comment form ,therefore hard to write CSS .
To know what HTML tags has been generated by javascript ,you can wait for page fully loaded ,and then save that page to your computer .
Check the downloaded page ,we can see what HTML tags in comment .
All of these HTML tags are decorated by CSS attributes in default Blogger CSS file . You can't download/edit/modify this CSS file . So the solution here is to write new CSS in template file to overwrite the defaults .
Here is the HTML code of threaded comment that I dumped in my blog :
<div class="comments-content">
<div id="comment-holder">
<div kind="x" id="xxx">
<div id="xxx">
<div u="x" t="x" kind="x" class="comment-thread" id="xxx">
<ol id="xxx">
<li kind="x" class="comment" id="xxx">
<div class="avatar-image-container">
<img src="avatar">
</div>
<div class="comment-block" id="xxx">
<div kind="x" class="comment-header" id="xxx">
<cite class="user"><a href="xxxx" rel="nofollow">Comment name</a></cite>
<span class="icon user"></span>
<span class="datetime secondary-text"><a href="xxx" rel="nofollow">date and time</a></span>
</div>
<p class="comment-content" id="xxx">comment body</p>
<span kind="x" class="comment-actions secondary-text" id="xxx">
<a o="r" target="_self" href="javascript:;" kind="i">Reply</a>
<span class="xxxxxx">
<a href="xxx" target="_self" o="x">Delete</a>
</span>
</span>
</div>
<div class="comment-replies" id="xxx">
<span kind="x" id="xxx">
<div u="x" t="x" kind="x" class="comment-thread inline-thread" id="xxx">
<span kind="x" class="thread-toggle thread-expanded" id="xxx">
<span class="thread-arrow" id="xxx"></span>
<span class="thread-count" id="xxx">
<span style="display: none;" id="xxx"></span>
<span style="display: none;" id="xxx"></span>
<a target="_self" href="javascript:;">Replies</a>
<div class="thread-dropContainer thread-expanded" id="xxx">
<span class="thread-drop"></span>
</div>
</span>
</span>
<ol class="thread-chrome thread-expanded" id="xxx">
<div>
<li kind="b" class="comment" id="xxx">
<div class="avatar-image-container">
<img src="avatar of people who reply comment above">
</div>
<div class="comment-block" id="xxx">
<div kind="m" class="comment-header" id="xxx">
<cite class="user blog-author"><a href="xxx" rel="nofollow">name of people who reply comment</a></cite>
<span class="icon user blog-author"></span>
<span class="datetime secondary-text"><a href="xxx" rel="nofollow">date and time reply comment</a></span>
</div>
<p class="comment-content" id="xxx">comment body</p>
<span kind="m" class="comment-actions secondary-text" id="xxx">
<span class="item-control blog-admin pid-868019743"><a href="xxx" target="_self" o="d">Delete</a></span>
</span>
</div>
<div class="comment-replies" id="xxx"></div>
<div class="comment-replybox-single" id="xxx"></div>
</li>
</div>
<div kind="ci" class="continue" id="xxx"><a target="_self" href="javascript:;">Reply</a></div>
</ol>
<div class="comment-replybox-thread" id="xxx"></div>
</div>
</span>
</div>
<div class="comment-replybox-single" id="xxx"></div>
</li>
</ol>
<div kind="ci" class="continue" id="xxx" style="display: none;">
<a target="_self" href="javascript:;">Add comment</a>
</div>
<div class="comment-replybox-thread" id="xxx">
xxxxxxxxx
</div>
<div kind="rb" class="loadmore loaded" id="xxx"><a target="_self" href="javascript:;">Load more...</a></div>
</div>
</div>
</div>
</div>
</div>
Please take a look at the code above . I censored unnecessary information in the code above . What we need to know is HTML tags and class attribute of these class .
Base on the HTML markup above ,we can write CSS code to decorate them as we want .
Here is the code that I applied in Simplex Bigblue template .You can consider it an example .
.comment {
list-style-type: none;
width: 100%;
}
.comment .avatar-image-container img {
width: 35x;
height:35px;
background: none repeat scroll 0 0 #FFFFFF;
border: 1px solid #DDDDDD;
margin: 0;
padding: 3px;
vertical-align: middle;
}
.comment .avatar-image-container {
float: left;
max-height: 36px;
overflow: visible;
width: 36px;
}
.comment .comment-block {
margin-left: 70px;
position: relative;
background: none repeat scroll 0 0 #F7F7F7;
border: 1px solid #E4E4E4;
border-radius: 4px 4px 4px 4px;
overflow: hidden;
padding: 15px 20px 5px;
}
.comment .comments-content .datetime {
font-size: 11px;
font-style: italic;
margin-left: 6px;
float:right;
}
.comment .comments-content .datetime a{
color:#999;
}
.comment .comments-content .user {
font-style: normal;
font-weight: bold;
}
.comment .comments-content .user a {
color:#333;
}
.comment .comment .comment-actions a {
background: -moz-linear-gradient(center top , #FFFFFF 20%, #E5E5E5 100%) repeat scroll 0 0 transparent;
border-color: #E4E4E4 #C4C4C4 #C4C4C4 #E4E4E4;
border-radius: 2px 2px 2px 2px;
border-right: 1px solid #C4C4C4;
border-style: solid;
border-width: 1px;
color: #424242 !important;
display: inline-block;
margin: 5px;
padding: 7px 10px;
text-align: center;
text-decoration: none;
text-shadow: 0 -1px 0 #FFFFFF;
font: 11px/18px sans-serif;
margin: 5px;
padding: 1px 6px;
}
.comment .continue a {
background: -moz-linear-gradient(center top , #FFFFFF 20%, #E5E5E5 100%) repeat scroll 0 0 transparent;
border-color: #E4E4E4 #C4C4C4 #C4C4C4 #E4E4E4;
border-radius: 2px 2px 2px 2px;
border-right: 1px solid #C4C4C4;
border-style: solid;
border-width: 1px;
color: #424242 !important;
display: inline-block;
margin: 5px;
padding: 7px 10px;
text-align: center;
text-decoration: none;
text-shadow: 0 -1px 0 #FFFFFF;
font: 11px/18px sans-serif;
margin: 5px;
padding: 1px 6px;
}
.comment .comments-content .loadmore.loaded {
background: none repeat scroll 0 0 #4488DD !important;
color: #FFFFFF;
max-height: 0;
opacity: 0;
overflow: hidden;
padding: 10px;
text-align: center;
}
You can copy this CSS code if you want threaded comment like Simplex Bigblue template ,or write more CSS code if you want to make it as you want .
Hope this post helpful to you .

Update : Blogger Fixed this error

Attracting traffic to your blog is not an easy task. Optimizing your blog needs to consider few important things. The design of blog, home page, content, images, SEO, and the text presentation plays crucial role in optimizing your blog on the net. The visitors often search for good quality content with attractive interface and images.
Use popular keywords
A good way to achieve the purpose of a successful blog is to use keywords which people tend to use more often so that they are directed to the blog with a greater frequency. This helps to achieve the objective of being able to reach out to a wider audience.Use keywords in the article
A good way to appeal to readers is to use the keywords a few times in the article so that they are easily able to relate to it and their interest in the contents does not sway to something else. Use shorter sentences When sentences are long or convoluted, people find it difficult to trace or remember the train of thought. They prefer reading shorter sentences as it has a great impact on them, so a good strategy to optimize ones blog is to use shorter sentences.Use relevant photographs
When people see that the writing that they have been searching for is aided by some visual medium such as photograph, they tend to relate to it better and thus find more interest in reading it. A photograph should be chosen in such a way that it says in a summary what the whole blog is all about without giving away the crust of the matter.Make it easier to subscribe to
When people see that they need to go through a long and painstaking process to register or subscribe to the blog, they tend to get deterred and choose to give up in the first place. So care should be taken to ensure that visitors can easily subscribe to the blog and begin their work of reading.Allow people to leave comments
Allowing people to leave comments enables them to have a sense of participation in the blog that they are viewing and so they tend to prefer that too other blogs which may have similar content. Another good aspect about this is that the comments or feedback from people helps in making changes as the readers are the people who have the best perspective of the blog.Optimizing a blog is an art as well as a science, and requires just a little bit of work and dedication in order to make it a big hit. There a host of bloggers on the net and it takes just a few easy steps such as these in order to be ahead in the race and have a good and successful blog.
About the author:
Brianne is a blogger by profession. She loves writing on gadgets. Beside this she is fond of books. She recently did an article on Wireless Laser Printer. These days she is busy in writing an article on comb over carpet.
Several days ago ,Blogger team announced new SEO functions for Blogger after a long time waiting :D These functions are grouped in Meta Tags, Errors and Redirections, and Crawlers and Indexing.In Redirections group,we got 404 page function and redirect dead links .
Now in this post ,I will show you how to create a custom 404 page for all Blogger templates and Simplex's templates .
Here are steps for making this 404 page
1, Read this step if you are using one of Simplex's templates .
If you apply all instructions in internet for creating a custom 404 page for Simplex templates,you will see nothing appear.
To fix this ,make a search for this line
<b:includable id='main' var='top'>The search result will look like this
<b:includable id='main' var='top'>
..........code here .blah blah blah......
</b:includable>
Add this code right after the line we search
<b:if cond='data:blog.pageType == "error_page"'>We make the code look like this
<b:include data='top' name='status-message'/>
</b:if>
<b:includable id='main' var='top'>What does this code mean ? it means if the page is not found , Blogger will call the includables status-message (<b:includable id='status-message'> ) which showing error message ( for more information on includables ,what are they and what they do ? you can read this post )
<b:if cond='data:blog.pageType == "error_page"'>
<b:include data='top' name='status-message'/>
</b:if>
..........code here .......
</b:includable>
Keep reading if you are using SimplexEnews template. Skip for other Simplex's templates
Because the includables for showing 404 message ( <b:includable id='status-message'> ) were changed for making breadcrumb bar ( this feature is only on Enews template ^^ ) so we need to fix this includable for showing both of breadcrumb bar and 404 error message .
Find this code
<b:includable id='status-message'>
<b:if cond='data:navMessage'>
<div id='breakcrumb' style='display:none'>
<data:navMessage/>
</div>
</b:if>
</b:includable>
And change it to
<b:includable id='status-message'>
<b:if cond='data:navMessage'>
<div id='breakcrumb' style='display:none'>
<data:navMessage/>
</div>
<b:if cond='data:blog.pageType == "error_page"'>
<div class='status-msg-wrap'>
<div class='status-msg-body'>
<data:navMessage/>
</div>
<div class='status-msg-border'>
<div class='status-msg-bg'>
<div class='status-msg-hidden'><data:navMessage/></div>
</div>
</div>
</div>
<div style='clear: both;'/>
</b:if>
</b:if>
</b:includable>
2, Now this step is for you all :D both of Simplex's templates and other templates
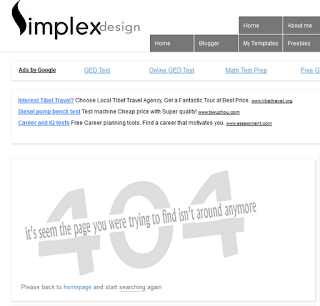
Go to Blogger Dashboard - > Search Preferences -> Custom Page not found -> click on Edit and add the content for your custom 404 page to the text box . You can add HTML code to this box so feel free to add anything you want ,for example : a cool picture ,a search box ,or a link ...
Here is what I did for SimplexDesign : A picture for 404 message and a small text ask the readers if they can back to homepage and search again .

If you want to make a 404 page with a picture ,the content of page can be something like this
<img src="link to your 404 picture">A 404 page with a search box ,the content of page can be something like this
Page not found ,back to Homepage
<h3>Your requested page was not found</h3>3,After two steps above ,you can type a wrong URL in your blog and see what is displayed .
<p>Sorry, we cannot find the page that you are looking for. It might have been removed, had its name changed, or is temporarily unavailable.<br/>
Please check that the Web site address is spelled correctly.</p>
<b>Other things to try:</b><br/>
<ul>
<li>Go to our <a href="/">home page</a>, and use the menus or links to navigate to a specific post.</li>
<li>
<form method="get" action="/search">
<table width="100%">
<tr>
<td><input type="text" style="width:95%;padding:2px;" value="Search this blog.." onfocus="if (this.value == "Search this blog..") {this.value = ""}" onblur="if (this.value == "") {this.value = "Search this blog...";}" name="q"></td>
<td><input type="button" Value="Search"></td>
</tr>
</table>
</form>
</li>
</ul>
Do you see your custom error message ?Does it has a gray background and a black border ?
Yes ,we can add more CSS to make the border and gray background disappear
Find the tag </head>
And add this code right before
<b:if cond='data:blog.pageType == "error_page"'>Now go back and see what happen to your 404 page . Is this what you want ?
<style type="text/css">
.status-msg-wrap {
font-size: 100%;
margin: none;
position: static;
width: 100%;
}
.status-msg-border {
display:none
}
.status-msg-body {
padding: none;
position: static;
text-align: inherit;
width: 100%;
z-index: auto;
}
.status-msg-wrap a {
padding: none;
text-decoration: inherit;
}
</style>
</b:if>
You can custom the 404 page as you want by adding your own CSS in step 3 or add your own HTML in step 2 .
That's all for a custom 404 page .Please do backup before making any change . If you are using a Simplex template ,please pay attention to step 1 and finish it before move to step 2 and 3 .

Many peoples complaint about their blog loading speed . 'Slow' is the term that I heard so much . So in this post ,I want to tell you some tips for increasing the loading speed .
1,Host javascript files in your host or Blogger template itself
Most of templates from SimplexDesign use a lot of javascript . Because blogger provide some APIs for designer ,so using javascript is the only way to masking -up the homepage . Javascript are also used for special effects in site ,for example sliders,tabs . In many Simplex's templates ,I used 110mb.com for hosting javascript files . It's a free hosting but not stable . Sometimes it downs ,all the blog that javascript files hosted in 110mb.com will be affected . So I suggest you all host javascript by yourself or host them in blogger template itself if you can't afford a hosting . If your site has a lot of traffic ,a host that support CDN technology is a good choice .
2,Remove unnecessary code
I checked many sites that report error ,they add a lot of codes, ad code ,toolbar ,tooltip ... These codes increase the loading time ,some of them conflict to existing scripts in template and make template not working properly .
3,Remove unnecessary widgets
Widgets can increase your loading time the way you've never thought .Believe it or not ,some widgets in blogger widget list is not from Google Blogger team ,it was built by bloggers ,and they also use javascript :D
4,Reduce social media buttons
Social media buttons are also use javascript for taking post url when page load ,more button ,more script to load . So I suggest you all keep popular social media buttons only ,Facebook ,Twitters ... or the networks you use the most . Use addthis.com service and keep the number of button in the minimum ,I think it will be better .
5,Avoid extra comment systems
Disqus or Facebook comment system can be modern comment systems with many functions ,but they are third party services ,all the comments and comment form are stored/loaded from remote servers . What happen if this service is busy or out of orders ? Many times ,I see facebook comment struggling in loading and then stop with a blank canvas ,no comment,no form displayed .
6,Load less posts
Another question that I see a lot . People want to increase the number of posts in archive pages ,increase the number of post sections in homepage ... Should we load more post and make blogger processing more data ,make client browser process more javascript ? Web browser can be stopped from working, go to 'idle' status if it has to process a lot of javascripts . I often meet this error in working with Firefox (a good browser but eat a lot of RAM and CPU processing )
7,Use default 'readmore' function
All Simplex's templates integrated 'auto readmore' function to create post summary with image for each post in homepage/archive page . But this script can be passed if we use Blogger default 'readmore' function . What is the difference ? The 'readmore' from blogger process data in server and send the result to client computer . 'Auto readmore' funtion use javascript for processing data in client computer . Your computer or Google server is more power ? I think you get your own answer .
8,Optimize images before posting
Images is the largest part of every website . Optimizing images before posting , reduce the number of images will make your blog load faster ,especially for template such as Simplex Portfolio ,Simplex Photography 2 ...
Here are 8 tips for increasing loading speed of Blogger blog . I hope it helpful to you . Feel free to leave comments and click like if you think it interesting :D Thanks for your support :D
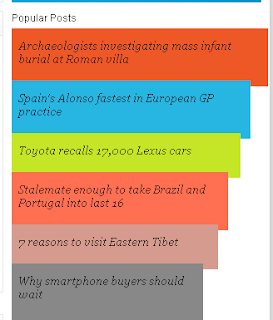
Popular Post widget has been published by Blogger long time ago . A helpful widget that show the most viewed posts in blog . In this post ,I will show you how to style this widget ,add colors to this one to make it look nice and exciting :D
This post contain Blogger API code ,CSS and a little of Javascript ,so it will be easier if you are familiar to them . Please read my posts on Blogger API to understand Blogger API and it structure , the 'section' and 'widget' code . If you are not sure on what is going on ,pls do backup template ,it will be helpful in case of any error .
Demo here
How to do it
1,Go to Dashboard ->Template - > Edit HTML
2,Add the CSS code right before ]]></b:skin>
.mostpopular {
list-style: none outside none;
margin: 0.3em 0 !important;
padding: 0;
}
.mostpopular_li {
background-image: none !important;
border: 0 none;
list-style: none outside none !important;
margin: 0 0 -7px !important;
padding: 13px 0 8px 8px !important;
position: relative;
width: 100%;
}
.mostpopular_li.color0 {
background-color: #EE5826 !important;
width: 100%;
}
.mostpopular_li.color1 {
background-color: #27B6E2 !important;
width: 93%;
}
.mostpopular_li.color2 {
background-color: #C5E627 !important;
width: 89%;
}
.mostpopular_li.color3 {
background-color: #FF6F51 !important;
width: 84%;
}
.mostpopular_li.color4 {
background-color: #D59B8E !important;
width: 80%;
}
.mostpopular_li.color5, .mostpopular_li.color6, .mostpopular_li.color7, .mostpopular_li.color8, .mostpopular_li.color9, .mostpopular_li.color10, .mostpopular_li.color11, .mostpopular_li.color12, .mostpopular_li.color13, .mostpopular_li.color14, .mostpopular_li.color15 {
background-color: #888888 !important;
width: 74%;
}
a.barlinko {
background: none repeat scroll 0 0 transparent;
display: block;
font: italic 13px georgia,serif;
margin: 0 6px 0 0;
padding: 0;
text-decoration: none !important;
}
a.barlinko:hover {
color: #FFFFFF;
}
.barco {
display: block;
right: 0;
}
.mostpopular_li img {
margin-top: 15px;
position: absolute;
right: 5px;
}
a.thethingwithc {
border: 0 none !important;
color: #FFFFFF !important;
display: block;
font-family: arial;
font-size: 11px;
font-weight: bold;
padding: 0 9px 0 0;
text-align: right;
text-decoration: none !important;
}
3,In template ,choose the position where you want to insert this widget ,and then add the code
<b:section id='sidebar' showaddelement='yes'>
<b:widget id='PopularPosts1' locked='false' title='Popular Posts' type='PopularPosts'>
<b:includable id='main'>
<div id='sidebartitlewrapper'>
<b:if cond='data:title'><h3><span><data:title/></span></h3></b:if>
</div>
<div class='sectioncont'>
<ul class='mostpopular'>
<script type='text/javascript'>
//<![CDATA[
var i=0;
//]]>
</script>
<b:loop values='data:posts' var='post'>
<script type='text/javascript'>
//<![CDATA[
document.write ('<li class="mostpopular_li color'+i+'">');
var i= i +1;
//]]>
</script>
<a class='barlinko' expr:href='data:post.href'><data:post.title/><data:post.id/></a>
<span style='display: inline-block;width:100%;'>
<span style='float: left;font-size:10px;color:#f5f5f5;'> </span>
<span class='cb'/>
</span>
<script type='text/javascript'>
//<![CDATA[
document.write ('</li>');
//]]>
</script>
</b:loop>
</ul>
</div>
<b:include name='quickedit'/>
</b:includable>
</b:widget>
</b:section>
Insert this code into sidebar as other script . Do not insert in other section element .For the question what 'section' is ,pls read this post
Save changes and go back to Dashboard .
4, Click on View blog to see the result . We need some work here
Click on the wrench icon in the right corner of widget

I marked it with a circle .
A dialog will display . Change the setting as picture bellow

Save settings .
That's all for this widget . Hope it works ^^


Recent Comments