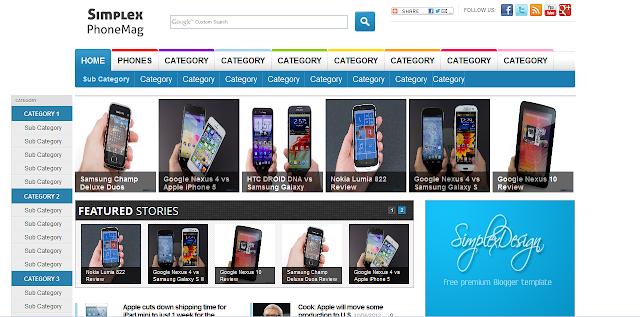
It's been a long time since the last template released. So in this post , I will come back with a template for magazine and newsportal . Demo of this template has been instroduced for a while and thanks for your suggestions, I finish this and decide to public, hope it helpful to you. This template will be hosted in Download Section. Any update or bug fixed will be there ,so you can check the Template Download page for new available.
It's been a long time since our last template released . In this post ,I will show you a new template name Simplex Orgmag . This is a simple template ,similar to Simplex buzz template but different in fonts and a bit in layout .This template was inspired by Origin mag template (Wordpress template) from WP Zoom . Base on their design ,I converted to Blogger and then made some changes .
You can take a look at the demo of this template .
I made two versions of template file .One version that all script has been integrated in template itself and the other that comes with script files so you can host the script yourself.

1, Download template .
2, If you choose version that host script yourself , you can download script files ,host them in your own host and then open template file , find this code
If you choose version that script integrated , you can skip this step .
3, To add the top navigation menu
Find this code
4, To add link to your social media
Find this code
5, To add link to main menu navigation

Find this code
6, Upload template to Blogger
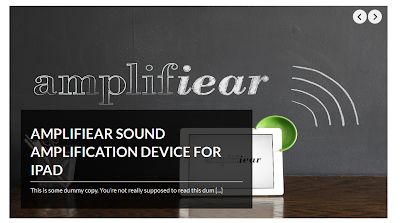
7,To add posts to slider

Click on edit link in Carousel widget
Add the name of category which you want to show posts in slider , like this
Save widget
8, To add posts to Latest news section
Click on edit link in Latest news widgets
Add the category which you want to show posts in widget content
9, Sidebar and footer are widget ready sections ,so you can add/remove/modify widgets easily for your purpose .
That's all for this template . Feel free to leave me comments .
You can take a look at the demo of this template .
I made two versions of template file .One version that all script has been integrated in template itself and the other that comes with script files so you can host the script yourself.

Demo | Download template script integrated | Download template without script | Script and image package
Here are steps for installing this template1, Download template .
2, If you choose version that host script yourself , you can download script files ,host them in your own host and then open template file , find this code
<script src='/dropdown.js' type='text/javascript'/>Replace the /dropdown.js and /jtools.js with the url to these files on your own host.
<script src="/jtools.js" type="text/javascript"></script>
If you choose version that script integrated , you can skip this step .
3, To add the top navigation menu
Find this code
<ul class='dropdown' id='mainmenu'>Add the url you want to this menu
<li><a href=''>About</a></li>
<li><a href=''>Archives</a></li>
<li><a href=''>Shortcodes</a></li>
<li><a href=''>Full Width Page</a></li>
<li><a href=''>Slideshow</a></li>
</ul>
4, To add link to your social media
Find this code
<ul id='navsocial'>Add the URL to your social media account in the code above .
<li>
<a href=''><img alt='RSS' height='16' src='https://blogger.googleusercontent.com/img/b/R29vZ2xl/AVvXsEjkMI5yWXRmTaOSFEZ2-5bByPv57lrnUgRq9_qphJw2JjPhTtsvEChs6oTpVYghsw2RDTwlSMppxqWbwLk8HVZtclFHBYWfyncPDjfdn1lInim1XSfTDdhK58bOkGiIDhBICeLqPwn_5HQY/' width='16'/>RSS</a>
</li>
<li>
<a href='http://twitter.com/' rel='external,nofollow'><img alt='Twitter' height='16' src='https://blogger.googleusercontent.com/img/b/R29vZ2xl/AVvXsEh1OPirws77R5QYLAqViMuRnzVYO054XePNvP2F6rKgFL87xNYCbDD44Y0wLocsV5gvnBkKJQXilzPK5ZRuePzHa842Xb7MmTp1rY7CZn5U89mGo5HdqHhN1SIqeLb16j4hBQ50kAQkBAhk/' width='16'/>Twitter</a>
</li>
<li>
<a href='http://facebook.com/' rel='external,nofollow'><img alt='Facebook' height='16' src='https://blogger.googleusercontent.com/img/b/R29vZ2xl/AVvXsEiYA3IbkHy7C08_Lfg3mWvVVoMk5N8V0MXz4FFr9aozAaUOVv5_MA-_iM2cM2cU9s1P8wQsY866hDNlojA8V-2o3H1RZ-vbOq94S6PFV7a8J4Yjo5fTEslvMeF4leBoHf6bZmVPvqr21fS2/' width='16'/>Facebook</a>
</li>
</ul>
5, To add link to main menu navigation

Find this code
<ul class='dropdown' id='secondmenu'>Add link to your categories in the code above
<li><a href=''>Home</a></li>
<li><a href=''>Apple</a></li>
<li><a href=''>Gadgets</a></li>
<li><a href=''>Technology</a></li>
<li><a href=''>World</a></li>
<li><a href=''>Auto</a></li>
<li><a class='sf-with-ul' href=''>Sport</a>
<ul class='sub-menu'>
<li><a href=''>Surfing</a></li>
<li><a href=''>Formula 1</a></li>
<li><a href=''>Rally Racing</a></li>
<li><a href=''>Football</a></li>
</ul>
</li>
</ul>
6, Upload template to Blogger
7,To add posts to slider

Click on edit link in Carousel widget
Add the name of category which you want to show posts in slider , like this
Save widget
8, To add posts to Latest news section
Click on edit link in Latest news widgets
Add the category which you want to show posts in widget content
9, Sidebar and footer are widget ready sections ,so you can add/remove/modify widgets easily for your purpose .
That's all for this template . Feel free to leave me comments .

One reader mailed to me for the problem with comment form in SimplexGamezone template . The comment form is not well design and it is pushed down bellow sidebar section .
I made a new version that fix this problem . All the download links for this template has been replaced to newer one .You can download newer version and re-install or update manually with this post
Download version 2
If you want to update manually ,here is steps :1,Find this code
<b:if cond="data:blog.pageType == "item"">Replace it with
<div class="breadcrumbed">
You are here:
<a expr:href="data:blog.homepageUrl">Home</a>
<span> /
<b:loop values="data:post.labels" var="label">
<a expr:href="data:label.url" rel="tag"><data:label.name/></a><b:if cond="data:label.isLast != "true"">,</b:if>
</b:loop>
</span>
</div>
<div id="uscolumnsingle">
<div class="1wrapperst">
<div class="2wrappernd">
<div class="uscontinue">
<div class="post">
<div class="ptitle">
<b:if cond="data:post.link">
<a expr:href="data:post.link"><data:post.title/></a>
<b:else/>
<b:if cond="data:post.url">
<a expr:href="data:post.url"><data:post.title/></a>
<b:else/>
<data:post.title/>
</b:if>
</b:if>
</div>
<div class="meta_author">By
<data:post.author/>
On <data:post.timestamp/> |
Categorized As
<b:loop values="data:post.labels" var="label">
<a expr:href="data:label.url" rel="tag"><data:label.name/></a><b:if cond="data:label.isLast != "true"">,</b:if>
</b:loop> |
With
<b:if cond="data:post.allowComments">
<b:if cond="data:post.numComments == 1">
1 <data:commentLabel/>
<b:else/>
<data:post.numComments/> <data:commentLabelPlural/>
</b:if>
</b:if>
</div>
<div id="mycontent"><data:post.body/></div>
<div class="clear"/>
</div>
<div id="authorarea">
<img width="60" height="60" class="avatar avatar-60 photo" src="simplexgamezone_files/d72f45aa0f1e49fdbe7dffa1ebdca7d2.png" alt=""/>
<div class="authorinfo">
<p><b>About <a title="Posts by admin" href="http://thesimplexdesign.com/">admin</a></b> -
Share a little biographical information to fill out your profile. This may be shown publicly. Share a little biographical information to fill out your profile. This may be shown publicly.</p>
</div>
</div>
<div class="share">
<ul>
<li>
<img border="0" alt="Add to Delicious" class="sharethis" src="simplexgamezone_files/share.png"/>
</li>
</ul>
</div>
</div>
</div>
</div>
<div class="page-bottom">
</div>
<div class="clear"/>
</div>
<b:include data="post" name="comments"/>
<b:else/>
<b:if cond='data:blog.pageType == "item"'>2, Find this code
<div class='breadcrumbed'>
You are here:
<a expr:href='data:blog.homepageUrl'>Home</a>
<span> /
<b:loop values='data:post.labels' var='label'>
<a expr:href='data:label.url' rel='tag'><data:label.name/></a><b:if cond='data:label.isLast != "true"'>,</b:if>
</b:loop>
</span>
</div>
<div id='uscolumnsingle'>
<div class='1wrapperst'>
<div class='2wrappernd'>
<div class='uscontinue'>
<div class='post'>
<div class='ptitle'>
<b:if cond='data:post.link'>
<a expr:href='data:post.link'><data:post.title/></a>
<b:else/>
<b:if cond='data:post.url'>
<a expr:href='data:post.url'><data:post.title/></a>
<b:else/>
<data:post.title/>
</b:if>
</b:if>
</div>
<div class='meta_author'>By
<data:post.author/>
On <data:post.timestamp/> |
Categorized As
<b:loop values='data:post.labels' var='label'>
<a expr:href='data:label.url' rel='tag'><data:label.name/></a><b:if cond='data:label.isLast != "true"'>,</b:if>
</b:loop> |
With
<b:if cond='data:post.allowComments'>
<b:if cond='data:post.numComments == 1'>
1 <data:commentLabel/>
<b:else/>
<data:post.numComments/> <data:commentLabelPlural/>
</b:if>
</b:if>
</div>
<div id='mycontent'><data:post.body/></div>
<div class='clear'/>
</div>
<div id='authorarea'>
<img alt='' class='avatar avatar-60 photo' height='60' src='http://1.gravatar.com/avatar/d72f45aa0f1e49fdbe7dffa1ebdca7d2?s=60&d=http%3A%2F%2F1.gravatar.com%2Favatar%2Fad516503a11cd5ca435acc9bb6523536%3Fs%3D60&r=G' width='60'/>
<div class='authorinfo'>
<p><b>About <a href='http://thesimplexdesign.com' title='Posts by admin'>admin</a></b> -
Share a little biographical information to fill out your profile. This may be shown publicly. Share a little biographical information to fill out your profile. This may be shown publicly.</p>
</div>
</div>
<div class='share'>
<ul>
<li>
<img alt='Add to Delicious' border='0' class='sharethis' src='http://magazine3.com/gameup/demo/wp-content/themes/gameup-single-v25-demo/icons/share.png'/>
</li>
</ul>
</div>
<b:include data='post' name='comments'/>
</div>
</div>
</div>
<div class='page-bottom'>
</div>
<div class='clear'/>
</div>
<b:else/>
<b:includable id="comments" var="post">Replace it with
<div class="comments" id="comments">
<a name="comments"/>
<b:if cond="data:post.allowComments">
<h4>
<b:if cond="data:post.numComments == 1">
1 <data:commentLabel/>:
<b:else/>
<data:post.numComments/> <data:commentLabelPlural/>:
</b:if>
</h4>
<b:if cond="data:post.commentPagingRequired">
<span class="paging-control-container">
<a expr:class="data:post.oldLinkClass" expr:href="data:post.oldestLinkUrl"><data:post.oldestLinkText/></a>
Â
<a expr:class="data:post.oldLinkClass" expr:href="data:post.olderLinkUrl"><data:post.olderLinkText/></a>
Â
<data:post.commentRangeText/>
Â
<a expr:class="data:post.newLinkClass" expr:href="data:post.newerLinkUrl"><data:post.newerLinkText/></a>
Â
<a expr:class="data:post.newLinkClass" expr:href="data:post.newestLinkUrl"><data:post.newestLinkText/></a>
</span>
</b:if>
<div expr:id="data:widget.instanceId + "_comments-block-wrapper"">
<dl expr:class="data:post.avatarIndentClass" id="comments-block">
<b:loop values="data:post.comments" var="comment">
<dt expr:class=""comment-author " + data:comment.authorClass" expr:id="data:comment.anchorName">
<b:if cond="data:comment.favicon">
<img width="16px" height="16px" expr:src="data:comment.favicon" style="margin-bottom: -2px;"/>
</b:if>
<a expr:name="data:comment.anchorName"/>
<b:if cond="data:blog.enabledCommentProfileImages">
<data:comment.authorAvatarImage/>
</b:if>
<b:if cond="data:comment.authorUrl">
<a expr:href="data:comment.authorUrl" rel="nofollow"><data:comment.author/></a>
<b:else/>
<data:comment.author/>
</b:if>
<data:commentPostedByMsg/>
</dt>
<dd class="comment-body" expr:id="data:widget.instanceId + data:comment.cmtBodyIdPostfix">
<b:if cond="data:comment.isDeleted">
<span class="deleted-comment"><data:comment.body/></span>
<b:else/>
<p>
<data:comment.body/>
</p>
</b:if>
</dd>
<dd class="comment-footer">
<span class="comment-timestamp">
<a expr:href="data:comment.url" title="comment permalink">
<data:comment.timestamp/>
</a>
<b:include data="comment" name="commentDeleteIcon"/>
</span>
</dd>
</b:loop>
</dl>
</div>
<b:if cond="data:post.commentPagingRequired">
<span class="paging-control-container">
<a expr:class="data:post.oldLinkClass" expr:href="data:post.oldestLinkUrl">
<data:post.oldestLinkText/>
</a>
<a expr:class="data:post.oldLinkClass" expr:href="data:post.olderLinkUrl">
<data:post.olderLinkText/>
</a>
Â
<data:post.commentRangeText/>
Â
<a expr:class="data:post.newLinkClass" expr:href="data:post.newerLinkUrl">
<data:post.newerLinkText/>
</a>
<a expr:class="data:post.newLinkClass" expr:href="data:post.newestLinkUrl">
<data:post.newestLinkText/>
</a>
</span>
</b:if>
<p class="comment-footer">
<b:if cond="data:post.embedCommentForm">
<b:if cond="data:post.allowNewComments">
<b:include data="post" name="comment-form"/>
<b:else/>
<data:post.noNewCommentsText/>
</b:if>
<b:else/>
<b:if cond="data:post.allowComments">
<a expr:href="data:post.addCommentUrl" expr:onclick="data:post.addCommentOnclick"><data:postCommentMsg/></a>
</b:if>
</b:if>
</p>
</b:if>
<b:if cond="data:showCmtPopup">
<div id="comment-popup">
<iframe scrolling="no" frameborder="0" allowtransparency="true" id="comment-actions" name="comment-actions">
</iframe>
</div>
</b:if>
<div id="backlinks-container">
<div expr:id="data:widget.instanceId + "_backlinks-container"">
<b:if cond="data:post.showBacklinks">
<b:include data="post" name="backlinks"/>
</b:if>
</div>
</div>
</div>
</b:includable>
<b:includable id='comments' var='post'>3,Adding this CSS code in CSS section
<div class='comments' id='comments'>
<a name='comments'/>
<b:if cond='data:post.allowComments'>
<div id="displaying">Displaying <b:if cond='data:post.numComments == 1'>
1 <data:commentLabel/>:
<b:else/>
<data:post.numComments/> <data:commentLabelPlural/>
</b:if>
</div>
<div id="haveyoursay">Have Your Say </div>
<br/>
<ol class="commentlist">
<b:loop values='data:post.comments' var='comment'>
<li id="comment-4" class="comment even thread-even depth-1 parent">
<div>
<div class="comment-author vcard">
<b:if cond='data:blog.enabledCommentProfileImages'>
<data:comment.authorAvatarImage/>
</b:if>
<cite class="fn"><b:if cond='data:comment.authorUrl'>
<a expr:href='data:comment.authorUrl' rel='nofollow'><data:comment.author/></a>
<b:else/>
<data:comment.author/>
</b:if></cite>
<span class="says">says:</span>
</div>
<div class="comment-meta commentmetadata"><a expr:href='data:comment.url' title='comment permalink'>
<data:comment.timestamp/>
</a>
<b:include data='comment' name='commentDeleteIcon'/>
</div>
<b:if cond='data:comment.isDeleted'>
<span class='deleted-comment'><data:comment.body/></span>
<b:else/>
<p>
<data:comment.body/>
</p>
</b:if>
</div>
</li>
</b:loop>
</ol>
<b:if cond='data:post.embedCommentForm'>
<b:if cond='data:post.allowNewComments'>
<b:include data='post' name='comment-form'/>
<b:else/>
<data:post.noNewCommentsText/>
</b:if>
<b:else/>
<b:if cond='data:post.allowComments'>
<a expr:href='data:post.addCommentUrl' expr:onclick='data:post.addCommentOnclick'><data:postCommentMsg/></a>
</b:if>
</b:if>
</b:if>
<b:if cond='data:showCmtPopup'>
<div id='comment-popup'>
<iframe allowtransparency='true' frameborder='0' id='comment-actions' name='comment-actions' scrolling='no'>
</iframe>
</div>
</b:if>
</div>
</b:includable>
.comments .avatar-image-container {
background: none repeat scroll 0 0 #FFFFFF;
border: 1px solid #DDDDDD;
float: left;
margin: 0 10px 10px 0;
max-height: 35px;
overflow: hidden;
padding: 2px;
width: 35px;
}
.comments .avatar-image-container img {width:35px;height:35px;}
#blog-pager {
float: left;
font-weight: bold;
margin: 1em 0;
overflow: hidden;
padding: 5px 15px;
text-align: center;
width: 625px;
}
That's all for update this template .

It's been a long time since the last template released . In this post I will show you the latest template Simplex Bigblue ,a new template for blogging purpose . This template use exist functions in blogger ,all javascript needed is integrated in template itself ,so it decrease the loading time , load smoothly and easily ,and better in SEO .
This template is now applied in SimplexDesign blog ,so I didn't make a new demo .
Download
How to install this template
1,Download template file2,Open template in a word editor such as Notepad++
3,To add social network accounts
Find this code
<ul class='social'>Replace the links in bold to your social network accounts .
<li><a class='social-feed' href='http://feeds.feedburner.com/Simplex' rel='nofollow' target='_blank'>RSS feed</a></li>
<li><a class='social-twitter' href='http://twitter.com/dinhquanghuy' rel='nofollow' target='_blank'>Twitter</a></li>
<li><a class='social-facebook' href='http://www.facebook.com/simplexdesignblog' rel='nofollow' target='_blank'>Facebook</a></li>
<li class='last'><a class='social-youtube' href='https://plus.google.com/u/1/108626685028871955867/posts'>Google+</a></li>
</ul>
4,To add Feedburner subscribe
Find this code
<form action='http://feedburner.google.com/fb/a/mailverify' class='newsletter-form' method='post' onsubmit='window.open('http://feedburner.google.com/fb/a/mailverify?uri=Simplex', 'popupwindow', 'scrollbars=yes,width=550,height=520');return true' target='popupwindow'>Replace it with the code that Feedburner provide you .
<input class='email' name='email' onblur='if (this.value == '') {this.value = 'E-mail';}' onfocus='if (this.value == 'E-mail') {this.value = '';}' type='text' value='E-mail'/>
<input name='uri' type='hidden' value='Simplex'/>
<input name='title' type='hidden' value='Simplex'/>
<input name='loc' type='hidden' value='en_US'/>
<input class='submit' name='submit' type='submit' value='Submit'/>
</form>
5,To add Advertisement to the space between first post and the rests in homepage and archive page
Find this code
<div class='home-content-ad'>And replace the text <!-- Ad code -01 --> to your own ad code
<div class='ad-code'>
<!-- Ad code -01 -->
<div class='clear'/>
</div>
<div class='clear'/>
</div><!--end .home-content-ad-->
6,To add ad code under post title
Find this code
<div style='margin-top:10px;margin-bottom:10px;'>
<!-- Ad code-02 -->
</div>
Replace <!-- Ad code-02 --> with your ad code
7, To add ad code in the space next to related posts section
Find this code
<div class='entry-bottom-ad'>Replace <!--Ad unit 3 goes here--> with your own ad code.
<h3 class='ad-title'>Advertisement</h3>
<!--Ad unit 3 goes here-->
</div><!--end .entry-bottom-ad-->
8,To edit credit name under each post
Find this
<div class='author-description'>And replace it with your own credit / bio .
<h3>HuyDinhQuang - administrator</h3>
HuyDinhQuang (known as Nhamngahanh) is a blogger and founder of Simplexdesign blog . Learn more about him <a href='http://www.thesimplexdesign.com/p/about-me.html'>here</a> and connect with SimplexDesign community in <a href='http://twitter.com/dinhquanghuy'>Twitter</a>,<a href='http://www.facebook.com/simplexdesignblog'>Facebook</a>,and <a href='https://plus.google.com/u/1/108626685028871955867/posts'>Google+</a>
</div> <!--end .author-link-->
9,Upload template to Blogger .
10,You can add/edit/remove widgets as your needs . There are many places for adding widget in this template.
That's all for installing this template . It's a template for blogging purpose ,so it's easier to install than others .
Note :
- This template use readmore funtion in blogger ,so you can create post summary in homepage /archive page just by adding a 'jump break' in post editor when editing post .(I marked this button with a circle)

- Popular Post function with thumbnail only works when all pictures in your post are uploaded to Blogger . Thumbnail can't be shown if your post use picture in another hosting .
- Adding search description , Search preferences will make your post have a higher rank in SEO

(A new update for this template has been released. Download link has been changed to newer one . For more detail on this update,you can check at this page )
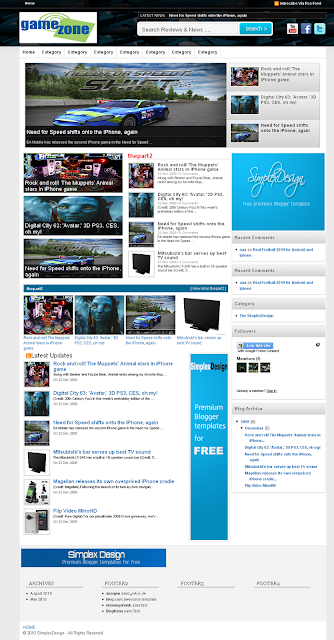
It's been a long time since SimplexLinepress came out to you all . I was very busy ,so I couldn't publish any template . But when everything is fine ,it's time for a new template . In this post ,I want to show you the blogger version of Gameup template from Magazine3.com : SimplexGamezone . Yes, another magazine template .Demo | Mirror | Download jquery-ui.js - Mirror
How to install this template
1,Download template file2,Download the jquery-ui.min.js file
To download these files ,click on the link . It open a new browser window . Click Save page as. Choose the place which you want to save and click on Save as
3,Upload this js file to your host . I have no hosting so I can't host it for you .
4,Open template in a word editor such as Notepad++
5,Find this code
<script src=".../jquery-ui.min.js" type="text/javascript"></script>
Replace .../jquery-ui.min.js to the url of jquery-ui.min.js file which you hosted .6,Find this code
<b:widget id='HTML6' locked='false' title='socialnetwork' type='HTML'><b:includable id='main'><div class="headerbookmark"><div class="headerbookmark1"><a href=""><img src="https://blogger.googleusercontent.com/img/b/R29vZ2xl/AVvXsEh_Gyb1BXo3BCAfuJv8mFbpi90wRZDNk78h6VEtBZIn-ctdOUzytzVuZfy7wZsZ81l-UlDtSUsVjUuAWE9OOBrBn0LX_zrk8WESqKB0xeIuIfgazlBEMqOz-h1meIhMD8F-4EMvIG6EYA/" alt="" height="36px" width="36px"/></a></div><div class="headerbookmark1"><a href=""> <img src="https://blogger.googleusercontent.com/img/b/R29vZ2xl/AVvXsEh0kFQtA07NQrb7bXQ3nvb2YNrG-VU2f6GoKcS96Wd7MrU2Zl2Zowsp59TgNXyFqUrrN4Jd4V6qeEfcof5TeDUT3KvXK2Vy9lEQLLIb3TWflFh8frfOhqJIkmDNto0dO_pO3clw3x25eQ/" alt="" height="36px" width="36px"/></a></div><div class="headerbookmark1"><a href=""><img src="https://blogger.googleusercontent.com/img/b/R29vZ2xl/AVvXsEgcKFphx0UgmQlxFp7gPjROMbsWUvU8SN3yCQhKT8IJp-FT-jVUrJwqNLqq3v4s-_juV7dUYS8hMCiUvHHDW_pUjyc8sp3Q7M9ox49ldXO0bymUSoSq8JsTOu4UU6J_S-uArVLxBbDpvw/" alt="" height="35px" width="36px"/></a></div></div><div class="clr"></div></b:includable></b:widget>
Add the url of your social networks to this code .
7,To edit the main menu
Find this code
<div class="menu-header"><ul id="menu-gameumne" class="menu"><li><a href="">Home</a></li><li><a href="">Category</a></li><li><a href="">Category</a></li><li><a href="">Category</a></li><li><a href="">Category</a></li><li><a href="">Category</a></li><li><a href="">Category</a></li><li><a href="">Category</a></li></ul></div>
Add link to categories to menu code above .
Link to category has structure like this
http://xxx.blogspot.com/search/label/category_name
8,Save template and upload it to Blogger
9,Go to Dashboard ->Setting ->Other - > Allow Blog Feed and change feed mode to Full
10,Go to Dashboard -> Layout
11,To add logo
Click on logo widget
Add the url of logo to widget content as structure bellow
12,To add content to newsticker
Click on headerticker widget
Add the category which you want to show posts in newsticker
13,To add content to slider
Click on slider widget
Add name of category which you want to show latest post in slider in widget content
14,Do the same for thepart1,thepart2,thepart3 ,latestupdate widgets .
14,To add the ad
Click on small ad widget

Add the ad code into widget content .

Do the same for other ad widgets
15,There's many place which you can add widget in this template .
You can add/remove them as you want .
Save changes . Ok ,you are done .
Installing this template is not different to other templates from SimplexDesign ,so If you familiar to others ,it only take you a few minutes .
I added the download link for js file . Because many of you complaint on 110mb.com hosting downtime . I hope with this js file and your host ,it can be much more easier .
I publish the template files and js file on dropbox website . So anytime I make a changes in template ,for fixing errors or doing something else ,this patch will automatically updated ,and you can get the latest updates with the same link ,don't need another download link . I will try to publish other templates to dropbox folder in future .
That's all for this template . Hope it helpful to you . Free to leave me comments :"D


Recent Comments