It's been a long time since the last template released. So in this post , I will come back with a template for magazine and newsportal . Demo of this template has been instroduced for a while and thanks for your suggestions, I finish this and decide to public, hope it helpful to you. This template will be hosted in Download Section. Any update or bug fixed will be there ,so you can check the Template Download page for new available.
Live Demo
Install instruction
1,Download this template .
Click on Template Download link in top navigation bar or access through this link
http://templates.thesimplexdesign.comFind the name Simplex Phonemag in the list and click on that name ,you will find a link for download. Template in xml format, all scripts have been integrated in template content itself ,and all images have been uploaded and hosted in Blogger server. So at this time, I think hosting and bandwidth can be put aside. In case you want to host them yourself ,feel free to email me , I will provide separated script files and images.
2, Open template file in a word editor such as Notepad, Notepad++ .
3, To add your social network accounts

Find this code:
<b:section id='header2' showaddelement='yes'>add your link to your social network accounts in href='' .
<b:widget id='HTML2' locked='false' title='share' type='HTML'>
<b:includable id='main'>
<div id='top_share'>
<ul class='s_sub'>
<li class='s_ml_1 s_dropdown_container'>
<!-- AddThis Button BEGIN -->
<a class="addthis_button" href="http://www.addthis.com/bookmark.php?v=300&pubid=xa-50bad8bc309e9a2f"><img src="http://s7.addthis.com/static/btn/v2/lg-share-en.gif" width="125" height="16" alt="Bookmark and Share" style="border:0"/></a>
<script type="text/javascript" src="//s7.addthis.com/js/300/addthis_widget.js#pubid=xa-50bad8bc309e9a2f"></script>
<!-- AddThis Button END -->
</li>
</ul>
<p>Follow us:</p>
<a class='s_fb_fanpage s_icon' href='' target='_blank'/>
<a class='s_twitteracc s_icon' href='' target='_blank'/>
<a class='s_rss_all s_icon' href='/feed/posts/defaults'/>
<a class='s_youtube_channel s_icon' href='' target='_blank'/>
<a class='s_google_channel s_icon' href='' target='_blank'/>
</div><!-- /top_share -->
</b:includable>
</b:widget>
</b:section>
4, To edit the main menu

Find this code
<div class='s_wrap clearfix' id='main_navigation'>Add the links to your categories into href attribute of the code above. In general, in Blogger, link to categories has format as bellow :
<ul class='clearfix' id="megamenu">
<li class='s_ml_1 selected' id='menu_home'>
<a class='s_ml_1 selected' href='/'><span>Home</span></a>
</li>
<li class='s_ml_1 ' id='menu_phones'>
<a class='s_ml_1 ' href='/search/label/phones'><span>Phones</span></a>
</li>
<li class='s_ml_1 ' id='menu_tablets'>
<a class='s_ml_1 ' href='/search/label/'><span>Category</span></a>
</li>
<li class='s_ml_1 ' id='menu_news'>
<a class='s_ml_1 ' href='/search/label/'><span>Category</span></a>
</li>
<li class='s_ml_1 ' id='menu_reviews'>
<a class='s_ml_1 ' href='/search/label/'><span>Category</span></a>
</li>
<li class='s_ml_1 ' id='menu_plans'>
<a class='s_ml_1 ' href='/search/label/'><span>Category</span></a>
</li>
<li class='s_ml_1 ' id='menu_discussions'>
<a class='s_ml_1 ' href='/search/label/'><span>Category</span></a>
</li>
<li class='s_ml_1' id='menu_gadgets'>
<a class='s_ml_1 ' href='/search/label/'><span>Category</span></a>
</li>
<li class='s_ml_1' id='menu_jobs'>
<a class='s_ml_1 ' href='/search/label/'><span>Category</span></a>
</li>
</ul>
</div><!-- /main_navigation -->
http://your blog link.blogspot.com/search/label/category_nameSo you can replace the text in bold in code above to your links.
5, To add your link to sub menu navigation

Do as step 4, but find the code bellow:
<div class='s_wrap s_sub_navigation clearfix' id='home_sub_navigation'>6, To add item to Side menu navigation
<ul class='s_ml_1'>
<li class='s_ml_1 s_label'>Sub Category</li>
<li class='s_ml_1 '><a class='s_ml_1' href='/'>Category</a></li>
<li class='s_ml_1 '><a class='s_ml_1' href='/'>Category</a></li>
<li class='s_ml_1 '><a class='s_ml_1' href='/'>Category</a></li>
<li class='s_ml_1 '><a class='s_ml_1' href='/'>Category</a></li>
<li class='s_ml_1 '><a class='s_ml_1' href='/'>Category</a></li>
<li class='s_ml_1 '><a class='s_ml_1' href='/'>Category</a></li>
<li class='s_ml_1 '><a class='s_ml_1' href='/'>Category</a></li>
<li class='s_ml_1 '><a class='s_ml_1' href='/'>Category</a></li>
</ul>
</div> <!-- /home_sub_navigation -->

Repeat step 4 for code bellow:
<div class='s_wrap' id='side_navigation'>7, Save templates and upload it to Blogger. Go to Blogger Dashboard - > Layout
<div class='s_container'>
<h3>Category</h3>
<ul class='clearfix'>
<li><strong><span class='s_icon s_carriers'/>Category 1</strong></li>
<li><a href=''>Sub Category</a></li>
<li><a href=''>Sub Category</a></li>
<li><a href=''>Sub Category</a></li>
<li><a href=''>Sub Category</a></li>
<li><a href=''>Sub Category</a></li>
</ul>
<ul class='clearfix'>
<li><strong><span class='s_icon s_carriers'/>Category 2</strong></li>
<li><a href=''>Sub Category</a></li>
<li><a href=''>Sub Category</a></li>
<li><a href=''>Sub Category</a></li>
<li><a href=''>Sub Category</a></li>
<li><a href=''>Sub Category</a></li>
</ul>
<ul class='clearfix'>
<li><strong><span class='s_icon s_carriers'/>Category 3</strong></li>
<li><a href=''>Sub Category</a></li>
<li><a href=''>Sub Category</a></li>
<li><a href=''>Sub Category</a></li>
<li><a href=''>Sub Category</a></li>
<li><a href=''>Sub Category</a></li>
</ul>
</div>
</div><!-- /side_navigation -->
8, To add logo
Click on logo widget
Add the image to widget content as structure bellow
<img src="image url"/>
9, To add content to editor pick section

Click on editor pick widget

Add the name of category which you want to show in Editor pick section
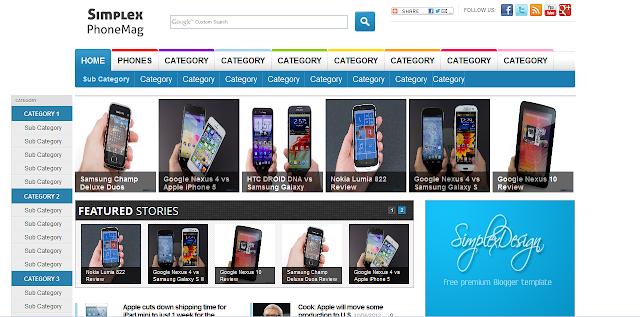
For example, I want to show posts under 'review' category into Editor pick section ,so in this image, I added "review" into widget content.

10, To add content to feature stories slider

Do the same as step 9.
11, For Latest review, Latest phones and Latest articles, repeat step 9.
12, There are 4 widgets designed for advertisment : Ad1, Ad2, Ad3, wide banner 720.
To add advertisment into these sections, just click on widget and add ad script into widget content.

13, This template is 'widget ready', so you can add your own widget in anywhere you want.
14, There are two type of display in this template, one will display phones

and the other will display articles

So when using this template, you have to decide which display your post will be. If your post is for instroducing a new phone , you should display it as 'phone' style. So in post window, just need to add a label 'phone' into label dialog.

If you want to display it as normal article, do not as 'phone' label anyway. Tt will display as a normal article.
15, This template use Google Search for showing result and it need a page in your blog for showing result, so you need to create a page.
To create them, Back to Blogger Dashboard -> Pages -> New Page -> Blank page.
Name this page whatever you like ,such as 'search result' .
And get the link to this page. It can be : http://your_blog.blogspot.com/p/search-result.html.
So in the page content, click on Edit HTML mode, Paste the content bellow into post content
Save pages.<style>
#cse-search-results iframe {width:680px;}
</style>
<div id="cse-search-results" style="width:680px;"></div>
<script type="text/javascript">
var googleSearchIframeName = "cse-search-results";
var googleSearchFormName = "cse-search-box";
var googleSearchFrameWidth = 800;
var googleSearchDomain = "www.google.com";
var googleSearchPath = "/cse";
</script>
<script type="text/javascript" src="http://www.google.com/afsonline/show_afs_search.js"></script>
Now back to Blogger Dashboard , click on Template - > Edit HTML -> Click Next if necessary -> you will see template xml content. Now search for the link by press Ctrl+F (Remember to check Expand widget templates before search)
http://3funpics.blogspot.com/p/search-rs.htmlAnd replace it with link to your search result page, in this case, it is
http://your_blog.blogspot.com/p/search-result.html.Save template .
16, To edit Text in a template or translating it to your language, just open template in a word editor and search for the word/term which you want to translate, it will lead you to where need to changes.
That's all . Now it's time for seeing the template working .
I hope this template will work well for you. Feel free to leave me feedbacks.


test
ReplyDelete